Happy Saturday, have you met Polly, Dolly & William yet?! Aren't they cute?!
This is another one of those fun Michelle Perkett Studio images that I just love! I colored Polly, Dolly & William with Copic markers and cut them out carefully with a Stampin' Up! Top Note die. I cut a second Top Note die to mat my first layer. The card is a tri fold with lots of room inside for writing a letter. I had in mind sending it to Operation Write Home when I was making it.
Here's a photo of the inside:
There's still a few days left to enter into the challenge to make birthday cards for Operation Write Home at the Michelle Perkett Studio challenge blog, I hope you'll come over and play along!
This Candy Land image is called Lane, isn't she pretty?! Tracey has done a wonderful job with these digital images! They are so fun to color too!!
"Lane" (I think that's what I'll name her) was colored with Copic markers, she's so pretty I thought keeping my card clean and simple would be the best way to show her off. I did add Stampin' Up! Crystal Effects to the candies and sprinkled a little Stampin' Up! Dazzling Diamonds on top.
I hope you enjoyed my The Stamping Boutique Candy Land sneak peak!
I'd like to introduce you to the new Candy Land line at The Stamping Boutique, this digital image is a Candy Land Game Piece. How cute is that?! When I saw this gingerbread man I knew I had to have him!! He's colored with Copic markers as are the peppermint candies, I forgot to mention the peppermint candies are a coordinating border digital image. I love having extra elements to work with, kind of like a rubber stamp set! I prefer digital images though, I like being able to re size them and copy and paste them all over a page to make my own designer papers.
I also used a Cuttlebug Candy Cane Stripe embossing folder, Spellbinder's circles dies and an acrylic stamp from the Papertrey Ink Signature Christmas set and black half pearls for his eyes.
The release date for the Candy Land line at The Stamping Boutique is Saturday, September 18th!
I hope you enjoyed my sneak peak!
Challenges: Cowgirl Up - Christmas cards for soldiers Sentimental Sunday's - Christmas Cards for Operation Write Home (with sentiment on the front of your card) Die Cut Dreams - Children's Christmas Fussy & Fancy Challenge - Christmas Colors Pile It On! - Christmas, Birthday or Anniversary for Operation Write Home
Did you get a chance to go and see all the cute Marci rubber stamps she's come out with?!
There are more coming soon but that's all I can tell you for now!
For my card today I used Birthday Marci and Basic Grey Kioshi paper. I just love her little panda bear! Instead of using black for my panda I used a darker brown and like the way it looks with these Basic Grey papers. My layout is SC283 from Splitcoaststampers, I haven't used one of their sketches for quite awhile! The flower is a Papertrey Ink die that I cut several layers of flowers and put them together and bent and scrunched until I was somewhat happy with it. The ovals are Stampin' Up! punches as is the photo corner.
Have you seen the cute new Halloween images Tracey has just put in the store at The Stamping Boutique?! They are totally cute! I just finished a card with her Halloween Monster and had to share it with you! The monster's three eyes made me think of the "googlie eyes" challenge Sandy issued several days ago at Operation Write Home Stars & Stamps so I just had to make this one up first!
I colored the Halloween Monster with Copic markers, he has a slight skin condition because I was having a hard time blending YG000 with YG11, but that's not unusual for monsters right? I just happened to have three eyeballs in my stash and I gave him dazzling teeth with Stampin' Up! Crystal Effects. I wanted to add some Stampin' Up! Dazzling Diamonds glitter to his teeth but I would then have glitter everywhere and for Operation Write Home that's a big no no. My birthday sentiment is computer generated, I was thinking of my kids and I think they'd squeal with delight if they got this for a birthday card!
I hope you enjoyed this little peak at a new release from The Stamping Boutique! I'll be making up some more cards with the other Halloween images soon!
It's our In Style Stamps Inspiration Challenge today, and this month we've been challenged to: Tell us what your favorite childrens book is and make a card/project based on it.
I used Janice from In Style Stamps, she comes as a digital image and you can find her here.
Here's my inspiration photo.
My youngest children are 9 and 10 now so I had to think about this one, at this stage of life they have Goosebumps books from the library, text books and music books for practicing their flute and recorder. They read to me out of the reading text books and I just love looking at the graphics to see how the images are colored and shaded as I listen. Sick huh?
I actually talked with them about this challenge and they brought me their old Zachary's Zoo book. We loved sitting and reading that one together not so very long ago. I had to study it for awhile before the card formed in my mind. Below is what I came up with.
The simplest thing for me to do was use as many of the colors from the cover of the book as I could.
Zachary is kind of in a canopy of tropical leaves so I used an old Close To My Heart stamp set for my leaves and even cut out a set of them to hang down over Janice just a little. The Stampin' Up! Top Note die with the oval cut out is to give the illusion that she's in the jungle too. I used a Quickutz die for leaves to make the tropical flower down in the right corner and added some tiny red rhinestones to it and I noticed the colorful toucan in the upper left middle of the book cover so I thought a purple butterfly would work okay there.
I can't wait to go see what our other In Style Stamps design team mates have made!
You can join in the fun at the In Style Stamps Inspiration Challenge too! Click the link above and it will take you there.
I feel like I should explain my "Just William" blog post title. The digital image I used for my card is called Polly, Dolly & William by Michelle Perkett Studio. I'd printed two copies and after using the first one on another card I had "just William" left over and didn't want him to go to waste, he's too cute!
I colored William with Copic markers and cut him out, my layout was a sketch but I don't remember where from now and my other computer is giving me a hard time.
I thought William would make a perfect birthday card for Operation Write Home. I didn't use a Happy Birthday sentiment on my card front because there was already text on the background paper and he's holding a gift. Michelle Perkett Studio is featuring Operation Write Home this week on our challenge blog!
In Style Stamps has new stamps and digital images being released September 24th!
My card today is a sneak peak of one of their digital images called Mailbox Love. When I saw this image I immediately thought of Operation Write Home, what a great image to use on some of the cards I'd like to make for the troops!
The layout for my card is Mercy Kerin's sketch challenge #90 at her Lord Have Mercy blog. The patterned papers are from the Basic Grey Offbeat paper pad. I colored the image with Copic markers and matted it on an additional piece of Offbeat patterned paper and a scalloped circle in white. The "love you" sentiment is a from a Flourishes tag set, I added a button with embroidery floss to my Spellbinder's tag after touching it up with my BG 72 Copic marker, it's attached with SU Crystal Effects for lasting hold. I also added three white half pearls to finish my card.
I hope you enjoyed my In Style Stamps sneak peak! Be sure to visit the In Style Stamps blog to see all of our new release image sneak peaks.
My card today uses a The Stamping Boutique image called If The Shoe Fits. I colored it with Copic markers, the red shoes are R32, R35 and R37. The "miss you" sentiment is from a set by Flourishes and my layout is a sketch from Operation Write Home Stars & Stamps awhile back.
My post is going to be a quick one today! I have some The Stamping Boutique sneak peaks to share with you a little later this week. I can't wait to show you the new images Tracey is releasing!
My card today features La La Land Crafts Sweet Dreams Marci, isn’t she the cutest?!
She’s colored with Copic markers to match the Basic Grey Offbeat paper. The layout for my card is sketch #107 from Clean & Simple Stamping, the flowers and scalloped die are made by Papertrey Ink, the “smile” sentiment is made by Verve Visual and it’s on a Spellbinder’s tag die. Clean and simple!
Sweet Dreams Marci will be available on September 15th along with 4 other Marci's in RUBBER! However, you can purchase the digital images of Cheerleader Marci and Marci with Rose at the Online Storenow!
For my lucky readers who live in Northern California, you can join the fun at one or
I can't believe it's the weekend again already, the Labor Day holiday has made me feel behind all week.
My card today uses a new digital image from Michelle Perkett Studio called Happy Birthday Sweetie. It was really fun to color with my Copic markers and then I had a hard time figuring out how to put it on a card.
As you can see, I managed. Clean and simple sometimes looks odd and I think that's what is happening for me here, I feel like - "isn't there something more I could do..." for this one.
The bright yellow patterned paper is from the DeLovely paper pad and the thin pink ribbon is part of the 1300 yards of ribbon I won at CHA in January.
I'd like to remind you of a couple of challenges too! Michelle Perkett Studio has a "Stitch It Up" challenge with a nice digital image prize and Stamps R Us has a "Make a Birthday Card For a Child" challenge featuring Operation Write Home you can play along in.
We're hoppin... blog hopping that is with The Stamping Boutique in remembrance of September 11th and in honor of Operation Write Home's first birthday. If you are hopping with us you should have arrived here from Jenn's blog. If you'd like to start at the beginning you can start here.
In remembrance of September 11th I made a couple of "Any Hero" cards that I'll send to Operation Write Home with my regular package I send each month. If you're interested in finding out more about Operation Write Home and how you can help make cards for our nations hero's I added a link in their name for you. TheOperation Write Home Stars & Stamps blog has challenges, prizes and fun stuff going on all this month to celebrate their first birthday so you'll want to visit there too!
For my card above I used a digital freebie Numbers 6:24-26 from Fred She Said Designs and the ribbon digi stamp from The Stamping Boutique. Speaking of freebies you can find The Stamping Boutique's ribbon as a freebie here. The papers I used were scraps that were beside my paper trimmer. The yellow panel is from the DeLovely paper pad. I printed both images, colored the ribbon with Copic markers, cut circles with Spellbinders dies and arranged and rearranged the elements until I liked what I saw. The black strip of card stock has been embossed with the Scor-Pal Scor Bug, it's hard to see in the photo.
I thought the bible verse Numbers 6:24-26 along with the yellow ribbon was perfect for my Any Hero card. I hope whomever receives my card is blessed by it.
My second card also uses the Yellow Ribbon from The Stamping Boutique. I was looking at the entries for the Operation Write Home Midweek Throwdown challenge and Pat has a card that totally inspired me. I just had to make a card like hers, so card two is C.A.S.E.ing Pat!
The layout is sketch challenge #90 from Mercy Kerin's blog Lord Have Mercy! I did see it on her challenge blog and thought, hmmm I like that. Then I saw how Pat had made it into a card and wow! It's one of those sketches that I've made three times now with different images and papers.
So... as you might know this card is also one of my favorite color combination's, red, white, blue and kraft! I added punched yellow stars to tie the yellow ribbon into it. I also added Stampin' Up! Crystal Effects to the stars to give them some shine and depth. The "hero" sentiment is from a Verve Visual stamp set, I masked everything but the "hero" word before I stamped it, it's cut out with a Spellbinder's tag die. The circle and pinking circle are also Spellbinder's dies.
Your next stop on our The Stamping Boutique blog hop is the wonderfully talented Jenn!
Just in case you get lost along the way in this hop I've listed the participants links below:
Do you remember this? It seems like a long time ago but it really wasn't.
What you're seeing is the first day of being under construction at our house in mid July. We've been working on replacing windows with new energy efficient ones through out the house.
The kids thought tearing the drywall off the walls was fun.
Ohh, the mess...
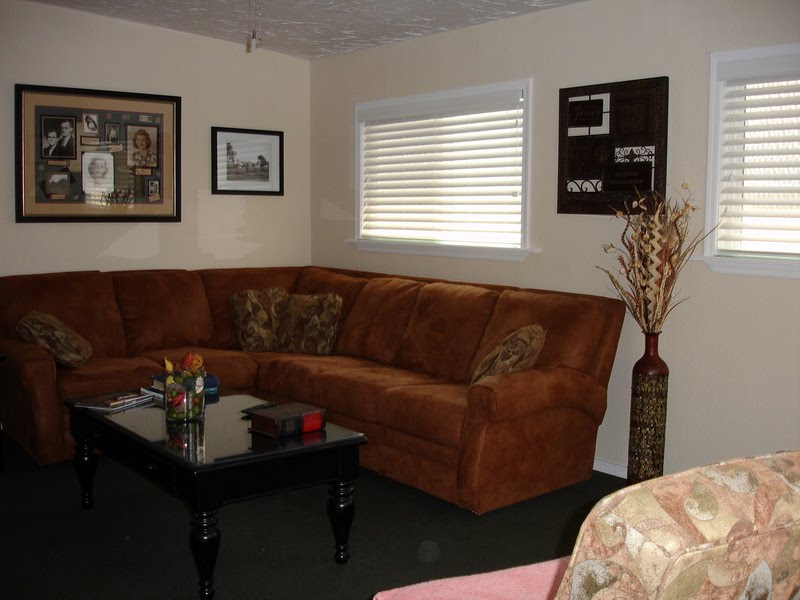
The job has been done for a couple of weeks now but I've been waiting on the window blinds before taking photos of the finished project.
When we started this project we had only one living room window.
We added two windows to this wall in the living room.
It's such a blessing not to live in a dark cave anymore!
I'll see you Saturday. I'm working on several upcoming sneak peaks and other stuff that needs my attention so I'm taking Friday off from blogging (here) this week. I hope you enjoyed seeing the finished construction project at our house.
Below is our inspiration photo, I hope you'll join us at In Style Stamps for this color challenge, you have the chance of winning In Style Stamps prizes for your entry! Click on the link and it will take you to all the details about the color challenge!
I didn't realize it until I looked around our house one day but I LOVE the fall color palette! Strangely enough if you go room to room you'll see mostly all the same fall color scheme, it was totally unplanned and I thought I had an eclectic mix of stuff. Guess not...
My card today was so fun to make, I chose Lizzie from In Style Stamps to work with, she comes as a rubber stamp as well as digital for us that like instant gratification. Lizzie is colored with Copic markers and my layout was a sketch but isn't recognizable as the sketch anymore. You'll notice I didn't use any patterned paper for this card, I used a Hero Arts background stamp on the green panel, a Cuttlebug embossing folder on the SU Summer Sun panel and a SU punch on the Kraft panel. The tag is a Spellbinders die and the sentiment is from Verve Visual, I added a thin scrap of Brick Red card stock through the hole in the tag to look like ribbon and the flower is a Papertrey Ink die I've been dying to have!
Be sure to stop by the In Style Stamps blog to see all of the other wonderful inspiration our design team ladies have for you today and join in the fun ~
And... be sure to check in at Operation Write Home Stars & Stamps today for the Midweek Throwdown Challenge - Thank You Cards With A Fall Theme and of course all the other challenges going on this month for our birthday celebration!
In Style Stamps will be featuring Operation Write Home September 19th, that's all I can say for now...
I just love this new Hugs & Kisses digital image by Michelle Perkett Studio! I think it's going to be perfect for cards for Operation Write Home, I can't think of anyone who wouldn't want to receive hugs and kisses from their deployed loved ones.
I colored the three kisses with Copic markers E59, E57 & E55 and was quite happy with the way they came out. I'm not used to using the darker colors and of course I used BG10 & BG0000 so I'd have mint chocolate hugs and kisses!
For such a cute image I kept my card clean and simple adding a little embossing and faux stitching and a couple of Dew Drops. The faux stitching was easier than I thought around the Spellbinders Oval after I'd embossed it. I need to remember that for future reference!
I have to mention the challenge at Michelle Perkett Studio that starts today too! The challenge is to make a card using a Michelle Perkett Studio image and use faux stitching!
I"m loving all the new Halloween and Fall digital images and stamps that I've been coming across lately, I'm having a hard time keeping up with them all because I want to color every single one! My card today uses a new release from The Stamping Boutique called Halloween Journal.
I re-sized it to fit my largest Spellbinders Circles die and colored it with Copic markers. I unintentionally tried the tip to tip blending technique when I touched the tip of my palest blue marker onto the brown I'd already colored, oops. The patterned paper was bought on clearance last year, I'm working on using up some of that hoarded patterned paper I've accumulated over the years.
I hope you've had a wonderful holiday weekend! I'm keeping my post quick today, I have a couple of kids home from school, have a nice holiday!
I'd like to introduce you to Rose Marci today, isn't she pretty?! She's one of the new rubber stamps in the La La Land Crafts Marci line that will be released September 15th. If you like instant gratification you can buy her and Cheerleader Marci as a digital image for a limited time here.
I had the pleasure of coloring Marci with Copic markers. She's cut out with a Spellbinders die and I kept my layout simple using De Lovely patterned papers and black half pearls.
Have you bought any of these cute digis yet?! If so, we'd LOVE to see what you're making with them in our CUSTOMER GALLERY on the blog so please come by and visit and share your cuties with us! You could be our monthly winning customer!!
Just a couple of reminders--- La La Land Crafts is showcasing one new stamp in the Marci/Luka line each week and making it available for purchase as a digi... for ONE WEEK ONLY. Then, they will reappear on September 15th as rubber stamps!!
and... to make room for the arrival of our new stamp line we've decided to have a Storewide 25% OFF Sale on ALL of our previous designs*!!!! Stop by La-La Land Crafts store today to stock up on some of your favorite Lala, Rosie and of course Animals!!! This is a great deal especially when combined with our FREE Shipping on orders over $50!! *sale price will be reflected in your Shopping Cart*digis excluded
I live in a resort town in western Arizona along the Colorado River and I thought Penelope would be perfect for this holiday weekend. She'd fit right in here! This is our last big weekend of the summer and we are up to our eyeballs in tourists and people from California who have second homes here on the river front. They call this place "the river", we call it Parker. I grew up in this area so as one of the locals I've done my grocery shopping early, gotten gas in the cars and plan on a quiet weekend at home with our family. The local people come back out on Tuesday when the crowd has returned home.
I've been wanting to make a shaped card and thought Penelope might be a good candidate. I pasted her into my Publisher program and adjusted her size to be five and a half inches wide and she automatically went to about three and a half inches tall. I could adjust that but I didn't want her out of proportion, so about 3 1/2" tall is good. I folded my card stock in half and cut her out and was happy with what I had so I started coloring her. I first put a piece of scrap paper inside so my markers wouldn't bleed through to the back of the card.
After I was finished coloring Penelope I applied Stampin' Up! Crystal Effects to the water under her for some wet shiney looking water. I forgot to take a picture of the inside, I stamped "You are special to me" and thought I might give it to my daughter one of these days.
Copic markers used:
Water - B97, B95, B93, B12
Tube - YR 09, YR15, YR21
Polka Dots - YG11, YG13,YG17
Swim Suit - YG11, YG13, B93, B12
Skin - E00, E000, E0000, R02
Hair - E30, E31, E33, Y32
Bow YG11, YG13, YG17
Don't forget the "Hang on to summer fun" challenge over at Michelle Perkett Studio, you still have a couple of days to make your card and enter! There's going to be a prize awarded Monday after 5:00 PM MST! Challenges: The Creative Cottage - Celebrations
I'm looking forward to the long weekend with our kids out of school. Operation Write Home Stars & Stamps blog has a Family challenge that started yesterday and goes for the month of September! Sandy has adorable free digital stamps and coloring pages for the kids to play along. The photo above is my two youngest kids working on their Any Hero coloring pages.
Michael is taking 30 copies of the coloring pages to school tomorrow for his teacher. I called her and asked if she'd like to get her class into the OWH challenge and she said, "YES DEFINITELY"! Michael's teacher was Jenny's teacher last year and we've gone to church together for years so I thought it might be a sure thing!
I've been having some computer problems the last few days and have a project for the girls ministry at our church so I spent yesterday working on making tea cups for their invitations. My Silhouette machine is hooked up to that computer and before it dies...
I thought it would be wise to take care of it! Here's a photo of the tea cups, I still need to make the insides.
It's a good start on the project I'm happy to say.
This computer is about to run out of battery power so I must go, have a wonderful Friday!
It's my second post today, I hope you enjoyed Jenny's cards!
We both used Michelle Perkett's Candy The Sweet Halloween Witch digital image, Jenny asked me not to use the same colors on mine as hers. That took me a moment but as I looked at the printed image and thought about her name I thought, "oh, candy corn", that helps! I know I'm weird!
Candy was lots of fun to color with Copic markers and I used a sketch layout that I'd saved and now I can't remember where it's from, sorry about that. I added a couple of punched stars and used Stampin' Up! Crystal Effects on them as well as the stars on Candy's shoes and hat.
My daughter Jenny and I had fun Saturday making cards for Operation Write Home using Michelle Perkett Studio images. Jenny is 10 years old and wanted to enter her cards in the OWH Midweek Throwdown challenge and the Michelle Perkett Studio Hold on to Summer fun challenge so I'm doing a seperate blog post for her.
She colored Olive with Copic markers and used the scraps by my paper cutter and left over die cuts for her card. She especially likes the self adhesive half pearls and gems and using my big tweezers.
Jenny's next card uses Candy by Michelle Perkett Studio. I'd printed this image but thought it was too small to color, she proved me wrong. Her eyesight is better than mine too!
Have you ever made a T Slide card? Me either... before today!
It's September 1st, the first Wednesday of the month so it's time for the In Style Stamps Sketch Challenge #13 and there's a little addition to the sketch this time, making it a T Slide card as well as following the sketch. I'll direct you to the tutorial that was provided for me so you can try it too!
Here's the link to Splitcoaststampers. The prize for participating in the sketch challenge this month is 2 digital images if you use an In Style Stamps image. One In Style Stamps digital image if you chose not to use one of their images. All winners are selected by a random number generator.
This was a fun and challenging card for me to make. I didn't have the same tools as was used in the tutorial so I needed to make some adjustments and I enjoy that kind of challenge. You know, figuring things out, modifying them and making them work for me. My card is 6 1/4" square because I wanted my digital image of Tracy to be nice and big for you to see and me to color. ;) The patterned paper on this card is from my almost gone pad of Basic Grey Urban Prairie. The card stock is Papertrey Ink Hawaiian Shores and the Yellow is from a ream in my stash that I need to use more often!
Tracy is colored with Copic markers, here's what I used:
Hair: R22, R37, R46, R59, E37, E44, E59
Skin: E00, E000, E0000, E04, R02
Eyes: YG11, YG13
Shirt: BG10, BG11, BG13
Pants: C6, C3, C1
Stool, phone: Y000, Y11, Y13, E43,E51
Here's a photo of the inside of my card. As I was putting my prototype together I was thinking about which of my In Style Stamps digital images I'd like to use and what the inside of the card should say.
One of my dear friends came to mind, she's struggling with life right now and has kind of pulled away. I understand it's not about me and people we love sometimes need their own time and space to figure things out. I think this would be a nice way to let her know I'm still here when she's ready.
Maybe I can put my card through the mail slot in the door where she works and pray no one steps on it before she sees it first thing in the morning.
And, here's the sketch for you to try. Be sure to stop by the In Style Stamps blog to see what our other fabulous designers have made with this sketch and what their T Square cards look like.
The prize for this sketch challenge are 2 digital images from In Style Stamps if you use and In Style Stamps image and one digital image if you don't. Challenges: Our Daily Bread - Texture It Speedy The Cat & Friends - Friendship Scrappy Frogs - Slider Cards Christmas Stampin' All Year Long - Anything But Christmas Your Next Stamps - Anything Goes
These cute ice cream cones and the sentiment I used are a digital stamp from Michelle Perkett Studio Etsy store. I printed them out twice and cut them apart for this card. I saw the sketch at Lime Light Paper Crafts August 18th and was intrigued. I also saw a card by Tammy one of our Michelle Perkett Studio Mermaids that she used this stamp and cut out an ice cream cone. At that point seeing these two different things I was inspired to make this card.
I colored the ice cream cones with Copic markers and cut them out, they are attached to the Spellbinders half circle with foam tape, I printed the digital stamp again on the gingham patterned paper and carefully cut off the sentiment so I could use it in my border strip. The brown scallops are a die made by MFT Stamps and the flowers are an EK Success punch with slightly enhanced Dew Drops added to the centers.
I hope you'll have time to play along in this weeks "Hold On To Summer" challenge at Michelle Perkett Studio! Stop by and see what our awesome Mermaids have created, I know you'll be inspired!
There's a $10.00 shopping spree for Michelle's Esty store to be won, we'll announce the lucky winner Monday, September 6th after 5:00 PM MST.
Challenges: Tanda Stamps-Beautiful Borders
I have some fun stuff from my Copic coloring book and a nice tutorial from The Stamping Boutique's blog to share with you today. The first photo is of my Copic coloring book, I've posted it here before so you may have already seen it. I made this 8 X 8 book for myself as a tool to help me remember great color combination's, record new techniques I've learned and to slowly be able to throw away all those little slips of paper with great color combos I'd like to try!
This second photo is a Copic color chart I printed, colored in and put inside the front cover of my book. Who knows maybe one day I'll need to take it and my markers somewhere with me!
On to the "good stuff"! I found a wonderful Copic coloring tutorial on The Stamping Boutique's blog by Ashley Scheffler. She has three different tutorials on how to color this The Stamping Boutique image called Beach Baby. I will give you a link to each so you can try it out for yourself. Here's the link to Coloring Water With Copic Markers. The next part of the tutorial is Coloring Sand With Copic Markers. And, the final tutorial for this image, Coloring Everything Else.
I've done my "homework" and written directions for myself and put them in my book.
I decided to do each tutorial separately so I could practice the coloring skills. I colored the image one more time and made up a card front with the new skills I've acquired by doing the tutorials!
Here she is up close and personal.
I really need to tell you that this was one of those images that really intimidated me when it came to coloring it. I made my first card with this image three months ago when I started on The Stamping Boutique design team and really wasn't happy with it but posted it. My daughter found the first card in my stash today and we compared them. My coloring has improved in 90 days, how fun, I think I'll keep practicing!
Edited to add:
Carol left a comment asking about where to get the Copic color chart. I believe it's on the Copic website but I had it in a folder on my desk top so I hope it's okay with Copic to share it with you here. Click on the photo to make it larger and then right click on your mouse to get a drop down menu, go down the menu to "save image as" and click, it's yours. I save this kind of stuff on my desktop so it's easy for me to find after downloading it. Enjoy!
I have another Marci card for you today! This is cheerleader Marci, she's going to be available for purchase as a rubber stamp September 15th with Irina's new Marci line at La La Land Crafts. In the mean time there is a 25% off sale on existing rubber stamps going on!
I colored cheerleader Marci with Copic markers to match a pad of Martha Stewart scrapbook paper I have. I'm sorry I don't have the marker colors for you, I colored her on a day that I was just coloring for pleasure. It took me longer to fuss over the layout of the card than it did to color Marci! Speaking of that, the layout is a sketch from A Gem of A Challenge blog that posts monthly challenges.
Happy Saturday! Have you had time this week to play in the Michelle Perkett Studio Back to School challenge? If not, there's still a few days left to enter and possibly win a little shopping spree at Michelle's Etsy store!
Meet Polly, Dolly & William
I love the vintage look and I can't wait to color them and make a card!
I've seen so many cards with Mary Margaret I've been inspired to color her and make a card for the challenge. I've been enjoying that "Report Card" paper pack too. I couldn't resist the checked paper and had to color her dress the same way, I have the perfect marker colors BG10 & BG11. If you frequent my blog you'll know I've been using those a lot lately, it just can't seem to be helped!
My layout is a past sketch from Taylored Expressions, there were three circles down the left side by the image and I saw apples. The apples are a digital image that I re-sized to 1/2" and printed, colored, cut them out and after attaching them to the card with foam tape I applied Stampin' Up Crystal Effects for some shine.