
I have a simple tutorial for you today.
- Making Your Own Embellishments -
I don't know about you but I live in a really small town in western Arizona. Our population changes due to winter visitors and summer tourists mostly from California that like to play on our river. Our little town is one square mile with Indian reservation sprinkled in here and there.
Now that you have a little background I'd like to say that I can't think of anywhere else I'd rather live and raise a family. I've lived in this general area most of my life, I ended up 32 miles from where I grew up. I've only found one real problem here though... There isn't a place to buy card making or scrapbook supplies unless you want to travel for 45 minutes and then it's nothing like some of you have in the larger cities.
That's one of the reasons for my quick tutorial today. The other is as a Bug A Boo Stamps design team member... it's my turn!

First we'll start with my finished card. I posted this one Thursday, February 24th for Oldie But Goodie Thursday at Bug A Boo Stamps Catch The Bug challenge blog.
I followed the Operation Write Home Stars & Stamps sketch #56 for my card layout.

As I was finishing my card I wanted something to go in that blank space on the strip of brown cardstock to the lower left side.

My cardstock colors are Stampin' Up! Chocolate Chip, Green Galore, Neenah Solar White & Sorbet Watermelon. I put the watermelon sheet through my OfficeJet printer and gave it brown polka dots to match the clowns tie.
In the picture above you can see where I tried to use Stampin' Up! Green Galore eyelets to fill that blank space. After two tries I realized there was a better way. I'd just make my own embellishments to go there.

I got out the smallest star punch I have and punched two stars out of the Stampin' Up! Green Galore and attached little squares of foam tape to the backs.

You get an idea of where they're going to go after I'd replaced the brown strip on my card for the third time. No one will ever know there are (how many?) holes under that strip of brown paper, so don't tell!

I've attached the two punched stars in this step of the process.
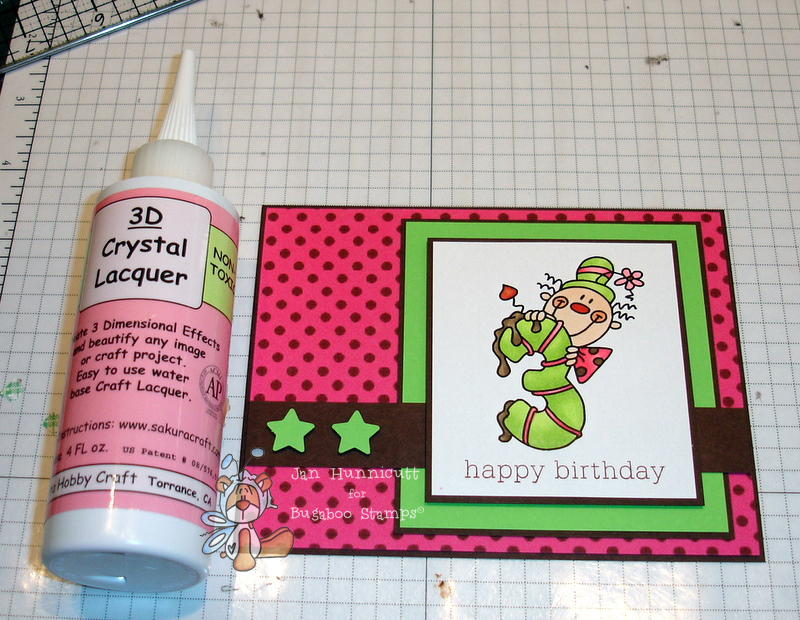
I think to be called an embellishment not just punched stars they need a little something extra, hence the crystal lacquer. A little glitter or Stickles sealed in the crystal lacquer can be fun too.

My last photo shows I've applied the crystal lacquer and moved it around to cover the stars with a toothpick and now I have embellishments I've made myself.
11 comments:
Jan you always inspiring me with your beautiful cards and LOVE reading your tuts.TFS...I left you something on my blog, check it out.
I am always so impressed with your colour combo choices, Jan and this little card is no exception. Thanks for the tutorial, too!
Very cute card Jan and thanks for the tutorial! I, too, have the same problem as far as where I live. I travel about an hour to get to the "city" where I can get supplies. Sometimes I just want to scream since I can't run to Hobby Lobby or Michales.....but such is life I guess. I really though these stars were brads!
Thanks again. Lynn
Thank you Jan for a great tutorial ! I love your card !
Yep Jan, the crystal laquer is the perfect effect! Great way to economize on embellishments! :D MWAH!
I agree, great color combo Jan. Question for you, what do you use to print different colored dotted paper? You have referenced changing the colors of the dots previously and you have my curiosity peaked! Is it a program or a digital paper pack or...???? Thanks for the tutorial!
Such a great card. I really need to try this lacquer technique. Really make a pop. :)
I love your card Jan!! Making your own embellies is fun, I haven't done it in awhile!!! thanks for the inspiration, your stars completed the card off perfectly!!! ;)
Wasnt it said that "Necessity is the Mother of Invention"? Great tutorial Jan, sometimes we forget to enjoy the simple things and you reminded us so nicely.
*Hugs*
~Andrea
What a great idea - and the colors match PERFECTLY! :)
Hugs & Happy Days!
~Min
Those little star embellies look perfect on this cute card! I often use a hole punch on cardstock and cover them with glossy accents to make faux brads! I love that it costs less to mail a card with these hand-made embellies too!
Post a Comment