Monday, January 25, 2010

Mojo Monday 121

My mojo is a little late, but that's pretty normal! There are so many fun challenges and creative things to do that I have a hard time keeping up.

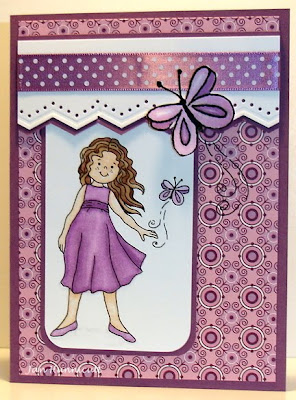
My image is a digi stamp from Fred She Said Designs. My paper scrap drawer has had a lot of good use lately, my patterned paper came from there. It's from PapertreyINK, the dotted satin ribbon is also. I used a Martha Stewart border punch, and did my coloring with Copic markers. To make the second butterfly I enlarged the digi image and printed it again and cut it out.

Happy Stamping!

Friday, January 22, 2010

Birthday Wishes

This is kind of a weird color combination for me. Do you ever seem to use the same colors all the time? Maybe it's because of Christmas and Valentine's Day that I keep going back to RED a lot.

The card stock, ink and ribbon are PTI Summer Sunrise and Ocean Tides, the White is my standard Neenah Super Smooth Solar White. I used Verve's Thankful Accents and Circular Sayings sets, birthday cards are something I try to keep a good stash of.

I made the patterned paper from the stamps in the set. I penciled a 1 1/4 inch square grid on the white card stock so I could stamp the flower image in straight (almost!) rows, then I stamped the hearts to fill in the bare spots. This is also a Mojo Monday sketch from July 2009.

Wednesday, January 20, 2010

C.A.S.E.ing Edna!

It seems to me I've been doing a lot of C.A.S.E.ing lately, I've been fortunate enough to see some beautiful cards in my browsing around the internet. I didn't have exactly the same stamps as Edna but I did have one so I thought I'd see what I could do. This took a long time to come together but there it is.

I used Spellbinders Flower Creations One & Two for my flowers, I sponged PTI Pure Poppy Ink on the white cut out flower pieces before I took them out of the dies. The flourish stamp is made by Hero Arts - I think it's going to be a wonderful background stamp! The Thanks so much is from Verve Visual. Oh, I added Crystal Effects to the dots around the flourish, when I took my picture it wasn't completely dry so it isn't as shiny as it will be. I loved Edna's black pearls on her card but I didn't have enough to cover all my dots so I improvised. Happy Stamping!

Tuesday, January 19, 2010

Doodle Dragon Studio Challenge Blog's 1st Challenge

I just had to do Dustin Pike's first challenge for his new challenge blog! The challenge is to make a Valentine card with one of his digital images. Who can resist Dustin's digital images?! Did you know he's a new designer for High Hopes Rubber Stamps too?

This was a really fun card for me, I used last years Basic Grey Bittersweet paper pad, Copic markers, Spellbinders Nestabilities Oval & scalloped Oval dies, and a new Stampin' Up! border punch. I also added a little self adhesive heart to finish it off.

Have a great day!

Monday, January 18, 2010

Shirleys 2 Girls Valentine

For today's card I used a digital image from Shirley's 2 Girls. Aren't they cute?! I colored the elephants with Copic markers and cut them out and popped them on another print out that I'd already colored the hearts on. I used a little Copic Spica clear glitter marker on the dots by the hearts, it's kind of hard to see in the photo.

The colored image is cut out with a Nesties rectangle die and layered onto a PTI Hibiscus Burst scalloped rectangle. The red card body is Neenah Red Linen card stock and I used a Martha Stewart border punch and a little dotted grossgrain ribbon from Michael's. Is that considered a one layer card? Hmmm, I'm not very good at making one layer cards - I tend to get carried away, good for me!

Friday, January 15, 2010

I have new stamp sets from Verve Visual today, Thankful Accents & Thankful Hearts. I saw this beautiful card at Sarah's Creations.

I knew I "needed" this set! I couldn't resist C.A.S.E.ing Sarah's card. Again, I used heat embossing and Spellbinders Nesties dies. The patterned paper with scallops around it is digital paper I printed and the other panel is the SU Linen background. I also used adhesive backed black half pearls and wide Organdy ribbon.

I'm really enjoying the digital papers. I've been exploring different web sites that do digital scrapbooking and they have my interest. Don't worry I'm not going to become a scrapbooker, my life is pretty much in albums already. What I'm really interested in are the hybrids they're using for cards. I'll fill you in as I learn more! For now, I'm working on learning Photo Shop Elements 7. I used it to edit my pictures and then couldn't export them... in the end I won.
Have a fun day!

Wednesday, January 13, 2010

Waltzing Mouse Valentine

I have another Valentine to share with you today, I just love this set from Waltzingmouse Stamps, it's called Season's Of Love. A quick and simple card. I stamped the heart image in SU Craft ink, added SU Clear embossing powder and heat embossed it. I must say my white paper is a super heavy weight card stock I bought last year on line, I really like the way it holds up to the heat gun. There isn't as much warping going on as I wait for the embossing powder to melt.

Next I cut out the heart with a Spellbinder's Nesties Heart die and one in red using the Scalloped Heart die. I love the way a lot of the Waltzingmouse stamps go with the Spellbinders dies. The body of the card is Carnival Red card stock and the first panel is Neenah Super Smooth Solar White run through the Cuttlebug using the Swiss Dots embossing folder. I added 1/3" Red Organdy ribbon and my card is ready!

Monday, January 11, 2010

Tiny Treats Valentines Day 2

Can you stand a couple more cards from the PapertreyINK Tiny Treats Valentine set? I hope so! I mass produced ten of these to finish a project for a friend that sends them to her math students for encouragement.

The black and white polka dotted paper is digi paper I printed myself. I'm sorry I don't remember where I got it, I have quite a collection! I colored the Kitty with Copic markers and masked off the "friends" part of the purr-fect in the sentiment stamp before I inked it. Kellee has eight cats right now and I think she'll think these are purr-fect!
And... here's that frog again. The sentiment is from another PapertreyINK set and those dots on the kraft paper are too. I colored the dots with my Spanish Olive Copic marker because in real life it all matches!

Friday, January 8, 2010

Tiny Treats Valentines

Help! I think I'm obsessed with this stamp set... I started playing with it yesterday and C.A.S.E.d Nicole Heady's card from her blog Capture The Moment and so far I have 24 cards.
The stamps and ink are PapertreyINK, I used Spellbinders Nestabilities dies and a little stitched ribbon and Copic markers. I think my favorite is the frog!
Have a great day!

Wednesday, January 6, 2010

Inspiration

I have another Squigglefly digital image for you today, she's called Inspiration. I took my picture in the mess of markers and stamping stuff on the table, I wanted to tell you what Copic markers I used but there were so many of them on the table when I finished that I wasn't sure anymore!

It's a mess but a creative mess none the less! Once again I used the Basic Grey Urban Prairie 6 x 6 paper pad and Stampin' Up! Rose Red card stock. I also used Spellbinders Nestabilities dies and half a dozen black brads. This is another sketch I wanted to try. I discovered the Skipping Stones Designs blog, they have lots of sketches for us to try.

Have a great day!

Monday, January 4, 2010

Mia and Bosko

What a fun digital image Mia and Bosko are to color! This is a digital image you can find at Squigglefly. I used Copic markers and the Basic Grey Urban Prairie 6 x 6 paper pad, SU Tempting Turquoise and Neenah Super Smooth White card stock, a little ribbon and some black brads. The "happy birthday" is from a PapertreyINK set.

I was intriqued by this sketch. Jody Morrow made a cute card and it's posted on her blog here so I should say I C.A.S.E.d Jody's card. In my browsing I found Jody's blog, I really like her style and the way she uses patterned paper in her designs.

Have a great day!

Friday, January 1, 2010

Prayer Journal C.A.S.E.

I was blog browsing the first part of December after checking out what was new at Clear Dollar Stamps and came across a really nice prayer journal. I've included a link to their gallery, I have first hand knowledge being a design team alumni, they have wonderfully talented ladies on their team! I'm not sure who's original idea it is but I knew I had to make one, at least one!
I kind of filed the idea in my mind but it just kept coming up. One of my dear friends had a house fire on December 4th, they lost almost everything. I thought okay Lord, I'm going to make the prayer journal and start using it right away! I thought of several people who would enjoy one as a gift too so I got busy. The one you see pictured here is mine, I made one almost identical as a gift and I need to make a few more.
The paper is a pad of double sided designer paper I bought at Michael's, the stamps are from There She Goes and Verve Visual. For the actual prayer card I used Microsoft Office Publisher to make it, I loved the Clear Dollar Stamps idea but knew I could make that part myself. I borrowed my stamping friend Susan's SU Top Note Die for the prayer cards too.
I also used Spellbinders Nestabilities dies, Copic markers and a Zutter Bind It All to put it all together. Have a blessed New Year & happy stamping!

Thursday, December 31, 2009

Project Planner

It's almost the new year, I've been busy planning projects to make for 2010 in our classes. I get stressed about what I'm going to make for a class usually. I thought maybe a little pre-planning might help. I'm constantly making and trying new things but I'm not sure if they are "class material" and that causes stress. As I said in a previous post my attention span for techniques and such is short, I'm ready to be on to the next thing as soon as I finish what I'm working on and that doesn't help me either!

So anyway, I put together a 3 ring binder with cards I want to make for classes, ideas, etc. I needed pockets to put things in and live in an extremely small town (did I mention in the middle of nowhere?) so I had to make my own pockets. I stole the desk calendar off my son's desk and folded each month to make pockets for my binder. I think I should mention his desk is piled high with junk and the desk calendar was on the bottom with July showing for the current month. So don't worry... he hasn't even missed it! ;)
I printed a 2010 calendar and attached them to divider tabs, filled my pockets, wrote myself notes and I'm somewhat prepared now. Whew!

Have a safe and happy New Year! We invited a few friends for dinner and board games, our 2 youngest children will be visiting Grandma and Grandpa. See you next year~

Monday, December 28, 2009

Making Plans

I hope you all had a wonderful Christmas with family! It's a busy time with kids out of school and all the fun get togethers with friends and family. Things are settling down at my house for now...

I've had to share my big kitchen table with my kids, they needed space to build their lego creations from Christmas. We crowded each other a little but I managed to share my stamping space with them.

Today's cards are a Patterned Embossing Class we are going to do in January. I saw the technique on Stamp TV and loved the idea. The card in the top of the photo is just SC258, I got tired of the patterned embossing technique before I had 3 cards finished. Sometimes this stampers' attention span isn't very long - on to the next thing!

Monday, December 14, 2009

Clean & Simple - Mo's Digital Pencil, etc.

My first card today is a digital image by Mo's Digital Pencil, she's called Cara Chatting. I thought she was a great teen image for card making and had to have her! I've been wanting to experiment with hair color and had written down Copic colors for hair from the Club Anya blog but hadn't had a chance or the pens yet.

A bunch of us ordered Copic markers together recently and I made some time Saturday to color and practice. The first two girls have red hair and I'm really happy with the way they turned out. I used YR04, YR07, E09 & E18. I feel like I played it real safe with the other colors but eventually branched out on my third card below.
This is my second card using Cara Chatting from Mo's Digital Pencil, I kept it safe using white cardstock and the Cuttlebug Swirls embossing folder. The sentiment is from the Verve Visual Circular Sayings set.
This is the last card I made with this image of Cara Chatting. I got a little braver with my color choices after looking through the scraps from a Stampin' Up! designer paper pack that retired a few catalogs ago. Cara's hair color on this one is medium brown, I used Copic E25, E29, E31 & E49. The sketch is from a Verve Visual challenge in January 2009.


I'm also excited to share with you that my Angel card was chosen as one of the C.A.S. favorites on Splitcoaststampers last week! I posted it in my gallery and just posted another card over the weekend and was reading comments when I made the discovery. I saw CAS FAV and thought what's that? So I clicked the link and found out, how cool is that?!

Friday, December 11, 2009

SC258 & Mass Production

I'm happy to tell you that I think I'm finished with mass producing Christmas cards for this year. I made 50 of these with my husband's help. He's getting very good at using the Cuttlebug and Spellbinders Wizard machines. He cut out the Sizzix bookplate die for this project.

The snowman is a digital image that came in a kit for scrapbooking. I needed something I could do quickly and thought this would be perfect for the job.
Have you ever had too much help? This is Inky checking out my photo box while I'm trying to get a nice picture of the card I just finished for SC258.


I was able to do Splitcoaststampers sketch challenge 258 this morning, what fun! I looked through the gallery there and was inspired by many of the cards so I decided to accept the challenge.

I used digital paper and the image from a kit I purchased and downloaded. I used the Cuttlebug snowflake embossing folder and gross grain ribbon and the card was finished.

I have about an hour before the kids get home from school, I'm going to go do some paper crafting. I hope you have time today to do something you enjoy too!

Tuesday, December 1, 2009

Leftovers


I know what you're thinking by the title of my post... Thanksgiving leftovers. We have them but that's not what I want to talk about today.

My card today is made from leftovers and I'm quite happy with the way it turned out! The PapertreyINK patterned paper is what I had left from the birthday card I made a couple of posts ago, it was too pretty to throw away. I have several sketch books and one was open on my table with this particular sketch from 2007. I'm sorry I couldn't see who's blog it was from.

The cardstock, patterned paper and ribbon are all from the PapertreyINK Raspberry Fizz collection, I also used Neenah Super Smooth White and 2 Stampin' Up! oval punches, oh... the sentiment is also from PapertreyINK it's from the Mixed Messages set. I couldn't have planned that if I'd tried. ;)

My husband made something for me today that I've been wanting for quite awhile, a light box for taking pictures of my cards. I'd mentioned it and he came in from the garage earlier with a white cube type box I'd used in the past for storing craft stuff. He turned it into a photo box for me, we tried it out on several cards and I think it's going to work nicely.

Have a great day!

Monday, November 30, 2009

Squigglefly Challenge #30


I have another fun card to share today, I must warn you I liked the layout so much yesterday I thought I'd use it again!

As I was having coffee this morning I was browsing blog feeds and saw a challenge at Sqigglefly and thought it would be fun to try. The challenge - use one of their Christmas images and use at least one candy cane embellishment on your card. As I looked over their holiday images I knew this snowman had to be mine and I was pretty sure I had some digital paper with candy canes on it. Ohh, I did!

I printed my image and stamped the sentiment from PapertreyINK, cut it out with Spellbinder's Nestabilities long narrow rectangles and colored it with Copic markers to match my digi paper. A Cuttlebug snowflakes embossing folder was used and some red dotted organdy ribbon by May Arts. It looks a bit orange in the photo but it's red in real life! I had to go look out in the garage for the snowflakes and was happy to find them in one of my overflow boxes. I used spray adhesive on the snowflakes and poured Stampin' Up! Dazzling Diamonds glitter on them. This snowman image is called "Catching Flakes", the last step was putting it all together. What a fun challenge, I'm happy I participated today!

Sunday, November 29, 2009


I just finished a birthday card that I'm excited to share with you today. I can't say who it's for because if she read my blog it would ruin the surprise. But as you can see she likes pink...

I was looking for some kind of "Sassy" image to color and maybe something where I could add lots of bling. I found this digital image at Sassy Studio Designs and thought it was perfect.

I used PapertreyINK's Razzberry Fizz cardstock, designer paper and coordinating satin ribbon. She's colored with the Copic marker's PapertreyINK recommends for their cardstock and I used Copic Spica glitter markers on her earrings, bracelet, lipstick and some of the ice cream. I used the Swirl Cuttlebug folder on the white panel with the ribbon and the Birthday Wishes sentiment is from Stampin' Up! Sincere Salutations cut out with the Spellbinders Nestabilites Circles dies.
My layout idea came from Maria Bell, I was blog browsing and saw something else she's made that I thought was fabulous and found a sketch for November 20th I had to try.

I hope you are enjoying this last day of the holiday weekend and had a Happy Thanksgiving!

Monday, November 23, 2009

Digi Stamps

Happy Monday, it's a beautiful day here in Arizona - 73 degrees at two in the afternoon.

I had time to color a digi stamp yesterday afternoon that's from Mo's Digital Pencil. There are two other digi stamps that come with this one, I really like the teen girl images. I'm working on 3 dozen encouragement cards for a friend who's a high school math teacher and thought these digi stamps would be perfect for her.

I printed my image on Copic Manga Illistration paper because I remembered I had it. I'm out of my favorite Neenah Super Smooth White card stock at the moment. There will be a delivery soon! We live in a very small town so I do most of my shopping for supplies on line.

Anyway... I colored the image with Copic markers and Copic Spica Glitter markers. The "You did it!" stamp is from SU Mini Mates and the sketch is from Crazy 4 Challenges week 12. The most time consuming part of the card was coloring the image, but it was fun!

Have a great day!

Saturday, November 21, 2009

Oops I disappeared again...

My first card today is one I just finished and wanted to post. I was blog browsing last night and came across a free digi image at Doodle Dragon Studios and had to copy it, print it and color it right away. I colored the image last night and discovered that I don't have any Hunter Green card stock so I had to search through my stash today so I could make my card. My stash is in my youngest son's closet and he was asleep by that time last night!

If you think this digi image is cute stop by Dustin's blog and check it out, he has a big sale going on Wednesday, November 25th for one day only.

I colored the image with Copic markers and highlighted the snow on the tree with a Copic Spica glitter marker. I used Spellbinders Nestabilites dies to cut out the image and tag, the dark green "Paper" used for matting is a piece of flocked paper I bought at Scrapbooks & More in Lake Havasu before they closed a year or more ago. When I went to emboss it, I really crushed the nap, oops.

I've also been working on making 100 of the cards you see below. This is a Christmas card for one of our local churches. I want them to be a surprise so I won't say which one. The image stamp is made by Stampendous and "Tis the season" is from a PapertreyInk set. I colored the image with Copic markers (did I mention 100 times?) and my wonderful husband ran it through the Spellbinders Wizard using the Labels 4 Nesabilities die for me. He also did the Cuttlebug embossing for me on the Kraft panel.

I think I'm pretty caught up now so maybe I'll be a better blogger!

Tuesday, November 3, 2009

Fleur De Lis


My stamping girl friend Susan brought over this Spellbinders Shapeabilities Fleur De Lis die set and a Cardmaker magazine a couple of weeks ago. There was an awesome card by Becca Feeken on the inside cover, she asked if we could "try that".

Of course we can! Mine just doesn't look much like Becca's anymore... I basically used her idea of using the pendant twice to make a pendant that was more, more dimensional.

These dies are really neat, and they're really big. This card turned into an A7, it fits the 5 x 7 envelopes.

I've been busy creating more cards for a friend who's a teacher, she sends out encouragement cards to her math students and I get to make them. How fun! I'll show you some of them soon.

I also have a project to mass produce 100 Christmas cards that I'm working on, I'll show you that one soon too. I think I have 30 of the 100 images colored so far and now I need to get back to that!

Happy Stamping~


Tuesday, October 27, 2009

Creative Frenzie

I've been having fun with a new stamp set I received Saturday from Waltzing Mouse stamps, it's called Vintage Christmas. This set is "Nestie friendly", I love it!

The first two pictures I have are Christmas gift tags. This stamp fits in the largest of the Small Labels set and the oval part I cut with an oval Nesties die so I could pop it to give it dimension and hide the stamp I'd already used on it.

Each of these tags were colored with Copic markers and the oval parts air brushed with the Copic ABS. I punched snowflakes and added blue rhinestones in the middle for the blue tag and colored and cut out holly that I'd used Crystal Effects on the berries for the green tag then added large eyelets and organdy ribbon. I cut extra Small Labels for the back of the tags so I could stamp "to" and "from" on the back.

My next card is for WSC103, I made it Saturday and haven't had time to do a blog post so today will have to work! I was trying to use as many stamps as possible out of the new Vintage Christmas set so I made my own paper by background stamping and sponging the edges. The stamped image is colored with Copic markers and I used round Nesties dies and one of the Nesties Doodle Parts dies and black brads to finish the card.
The next two cards I made today, I'm trying to come up with some Christmas card designs I'm happy with. I'm getting there!
I used Navy Blue, Papertrey's Spring Rain and Neenah Super Smooth White card stock. The image is colored with a Copic marker cut out with round Nesties die and matted with a label die, the background is a Snowflake Cuttlebug embossing folder and the snowflakes are a old dull punch I need to part with and blue rhinestones.
My last card today is very much the same but I wanted to try the Nesties Eyelet pendant and border dies and added some half pearls.

I need to put this awesome set away for a while and come up with Christmas cards that I can mass produce 100 or more of next. So many stamps so little time... Happy stamping!

Friday, October 16, 2009

Trick or Treat!

I've been stamping again after almost five months! Sure is fun!!

I've spent the last couple of days stamping with friends and planning some classes for the near future.

The image I used today is a digi stamp from Hambo Stamps that I downloaded recently. I colored it with Copic markers, matted it with black card stock and attached it to a card. I stamped the Trick or Treat stamp from Michael's dollar bin after I colored the image.

The card body is a scrap of kraft card stock background stamped with Stampin' Up! retired Decorative Dot from 1997, a Cuttlebugged SU Eggplant Envy and a velvet rick rack ribbon from Clear Dollar Stamps. I used foam tape to pop the layer with the ribbon and the main image.

The picture above is the inside, the sentiment is retired SU Halloween Smiles 2003 and another dollar bin stamp from Michael's colored with Copic markers.

It's only a few weeks away from Halloween but the temperatures here are still near 100 in the daytime. I enjoy being able to open the windows and let the cool fresh air in but have to close up the house about noontime and turn the air conditioning back on. It shouldn't be too much longer...

Monday, May 18, 2009

On Vacation...

Hi Everyone,

I'm having some health problems and need to step away from several things I've taken on. Unfortunately blogging is going to be one of them. I'm not sure when I'll return, possibly August when the kids are back in school.

I'm still going to be paper crafting and hope to actually have more time for myself, my family and the fun creative stuff we all need in our lives.

I'd love it if you'd keep me in your prayers, thanks for stopping by!

Thursday, May 7, 2009

Good news! I received a phone call this morning from the bride who's wedding invitations I posted yesterday, she chose the first card for her invitations!


Today's cards are samples for a bride who's getting married in Las Vegas. She wanted something less traditional and her colors are black and fuchsia, she chose flip flops and Hibiscus flowers for her Save The Date magnets. That gave me some ideas to start with and here's what I have so far!
I used the Cuttlebug Swiss Dots embossing folder on the pink panel but it's really hard to see in the picture.

Supply List: Neenah Classic Crest Solar White Super Smooth 80lb. cover, Poptones Razzle Berry 65lb. cover, Pegasus Midnight Black 80lb. cover, Spellbinders Oval & Scalloped Oval dies, Quickkutz Flip Flops die, Stampin' Up! Sincere Salutations, I can't read the name on the Hibiscus Flower stamp anymore, and my computer to print the R.S.V.P. cards and insides of the invitations.
The second card above is also a sample invitation using Black 1/4" Grosgrain ribbon and no rubber stamps. The R.S.V.P. card is identical to the one above.

Have a great day!

Wednesday, May 6, 2009

Wedding Invitations

I thought I'd take a moment and do a blog post, I've been working on samples and bids for wedding invitations. I've been asked to make invitations for two weddings that are on the same day but in different cities.

I'd forgotten how much work it is calculating the cost of all the supplies needed and trying to figure out how to get paid for my time too!

I delivered three samples with bids to my first bride yesterday afternoon. The first card above I think is my favorite, it's simple and clean and I hopefully won't go crazy mass producing 350 of them.
The second card pictured above is just a step up from the first one, I added a layer and used a different Cuttlebug embossing folder.

Supplies Used for the first two cards: Neenah CC Solar White Super Smooth 80lb. cover stock, Thepapermill.com Dark Purple, Cuttlebug Swirls & Elegant embossing folders, Just Rite Stampers Monogram alphabet, and a Copic marker.
The third sample above has more layers and I used more dies. I added one more paper color using a lighter purple from the same source as the dark purple for a good match. The dies I used are Spellbinders Nestabilities Rectangle and Scalloped Rectangle and the hearts are a Quickkutz die, the embossing folder is Swiss Dots by Cuttlebug. I think I've used it a bit too much lately!

For the R.S.V.P. cards I used the same Cuttlebug embossing folder as the invitation, drew a line with a Copic marker to create a border and embossed the top section in an effort not to create more bulk, work or expense.

I'm taking a mental health day! I'm waiting on one stamp to arrive in the mail from my other bride to finish up the R.S.V.P. cards. Last night I was browsing Digital Stamps at a bunch of different web sites, I bought a few so today I'm going to color them and see what I can make. I have the Splitcoaststampers Color Challenge and Sketch Challenge in front of me and I can't wait to be ... gonestampin!

Have a fabulous day~
Sunday, May 3, 2009

We Have A Wedding Date!

My cards today were a project I had the privilege of making last week for a special outreach the Parker Ministerial Society is doing. They are actually envelopes that will hold papers and other information. I had the opportunity to use my collection of "Plain Jane's" by Verve Visual, I also experimented with a bunch of the Cuttlebug embossing folders I've collected. Once I found a sketch I liked it was fast and fun to mass produce twenty four of these in assorted colors with different bible verses. It's sometimes a good thing to obsess over things and need to see them in several different colors!
It's a busy time around here, I made 40 Christening invitations before the Ministry envelopes. My oldest son called yesterday and put me in contact with a friend that needs 350 wedding invitations. I have a prospective job in the works for 100 wedding invitations and both of the weddings are on the same day. Hmmm, we'll see how this all works out!

Speaking of weddings... I'm getting married July 4th! Rick asked me to marry him Christmas eve and we've been working on setting a date and decided on the 4th of July. We thought it would be a fun way to celebrate our birthday's - June 30th and July 7th. It's going to be a very small ceremony with no frills, I've done this before and don't think the wedding is what's really important it's the life after the wedding.

I need to go work on those samples of wedding invitations now...